Peach Pretzel Salad Dessert-Sweet Salty Perfection
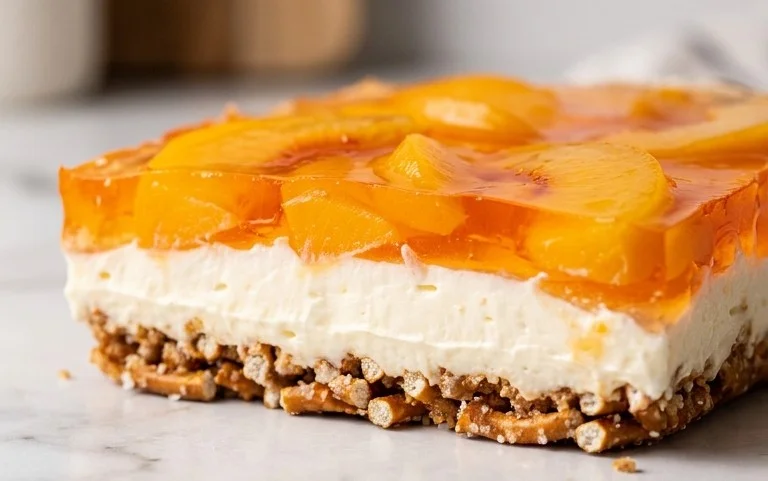
Peach Pretzel Salad Dessert is one of those magical dishes that has a way of bringin extractg smiles to faces and creating instant nostalgia. Have you ever craved a dessert that’s both delightfully sweet and surprisingly salty, with a texture that keeps you coming back for bite after bite? That’s the undeniable charm of this beloved creation. What makes the Peach Pretzel Salad Dessert so incredibly special is its ingenious combination of classic comfort with a playful twist. The creamy, luscious peach layer, often brightened with cream cheese and whipped topping, offers a soothing sweetness. Then, the unexpected crunch and savory hint from the buttery pretzel crust provide a delightful counterpoint, making each mouthful a complex and utterly satisfying experience. It’s the kind of dessert that’s perfect for potlucks, family gatherings, or simply a treat to brighten any ordinary day.
The Ultimate Peach Pretzel Salad Dessert: A Sweet and Salty Symphony
Get ready to experience a dessert that’s truly greater than the sum of its parts. This Peach Pretzel Salad Dessert is a delightful paradox – a cool, fruity, creamy creation with a surprising, utterly addictive salty crunch. It’s the kind of dessert that makes people ask for the recipe immediately, and it’s surprisingly easy to put together. Perfect for potlucks, holidays, or just a spontaneous craving, this treat offers a refreshing contrast of textures and flavors that will have everyone coming back for seconds. Let’s dive into creating this masterpiece!
Ingredients:
Crafting the Sweet and Salty Pretzel Crust
The foundation of our Peach Pretzel Salad is a sweet and salty crust that provides an incredible textural contrast. It’s not just about the crunch; it’s about how the salty pretzel pieces mingle with the sweetness of the butter and powdered sugar, creating a base that’s both familiar and exciting. Don’t be shy with crushing those pretzels – you want a good mix of fine crum extractbs and slightly larger pieces for that varied texture.
1. To begin extract crafting our irresistible crust, take your 2 1/2 cups of crushed pretzels and place them into a medium-sized bowl. Ensure they are well-crushed; a food processor works wonderfully for this, but you can also place them in a sturdy zip-top bag and crush them with a rolling pin or the bottom of a heavy pan. In a separate small bowl, combine the 3 Tablespoons of powdered sugar with the 3/4 cup of melted butter. Stir this mixture until the sugar is completely dissolved into the butter. Pour the butter and sugar mixture over the crushed pretzels. Stir everything together thoroughly until the pretzel crum extractbs are evenly coated with the butter mixture. This coating is what will help the crust hold together.
2. Now, it’s time to press this delicious pretzel mixture into your serving dish. A 9×13 inch baking dish is ideal for this recipe. Gently but firmly press the pretzel mixture evenly across the bottom of the dish. You want a compact layer that will hold its shape when sliced. You can use the back of a spoon or a flat-bottomed glass to help achieve a smooth and even surface. For an extra sturdy crust, you can optionally bake this layer for about 8-10 minutes at 350°F (175°C) until lightly golden brown, but this step is entirely optional and the salad will set up perfectly without baking. Allow the crust to cool completely if you choose to bake it. If not baking, simply set it aside while you prepare the next layers.
Building the Creamy Dreamy Layer
This layer is where the dessert truly gets its “salad” feel, but in the most decadent way possible. The cream cheese provides a tangy richness that beautifully balances the sweetness of the fruit and gelatin, while the whipped topping adds an airy lightness. The optional pasteurized egg, if used, adds an extra layer of smoothness and richness to this creamy filling, making it even more luxurious.
3. Prepare the creamy layer by taking your softened 8 oz. package of cream cheese and placing it into a large mixing bowl. Add the 1 cup of powdered sugar and the optional 1 pasteurized egg. Beat these ingredients together with an electric mixer on medium speed until the mixture is completely smooth and creamy, ensuring there are no lumps of cream cheese remaining. This might take a few minutes, so be patient. Scrape down the sides of the bowl as needed to incorporate all ingredients. Once you have a smooth base, gently fold in the 8 oz. carton of thawed whipped topping. Do this carefully to maintain the airiness of the whipped topping. You want to incorporate it until just combined, avoiding overmixing, which can deflate the whipped topping and make the layer less light. The result should be a fluffy, luscious filling.
The Wobbly, Fruity Heart
This is where the vibrant color and refreshing fruit flavor come into play. The peach gelatin forms a beautiful, jiggly layer that is both visually appealing and wonderfully refreshing. Using real peaches adds a delightful chew and natural sweetness that complements the artificial peach flavor from the gelatin perfectly.
4. Now for the vibrant, fruity layer! In a heatproof bowl, combine the 2 1/3 cups of boiling water with the 6 oz. box of peach gelatin. Whisk vigorously until the gelatin is completely dissolved. This is crucial to avoid any grainy texture. Let this mixture sit at room temperature for about 20-30 minutes, or until it begin extracts to thicken slightly, almost like a syrup. This slight thickening is important; if you add the fruit and peaches to hot gelatin, they might sink to the bottom. Once the gelatin has thickened slightly, gently fold in the 4 cups of sliced peaches. If you’re using canned peaches, make sure they are well-drained to prevent excess water from diluting the gelatin.
Assembling Your Masterpiece
The final steps are all about bringin extractg these delicious components together to create a harmonious dessert experience. The layering is key to achieving the signature look and taste of this beloved dessert.
5. It’s time to assemble! Carefully spoon the creamy cream cheese mixture evenly over the cooled pretzel crust, spreading it out to create a smooth and uniform layer. Ensure the entire surface of the crust is covered. Next, gently pour the thickened peach gelatin mixture, with the sliced peaches suspended within it, over the cream cheese layer. Try to distribute the peaches as evenly as possible as you pour. You can use a spatula to gently nudge them into place if needed. Once assembled, cover the dish tightly with plastic wrap, making sure the wrap doesn’t touch the surface of the gelatin. Refrigerate the Peach Pretzel Salad Dessert for at least 4-6 hours, or preferably overnight, to allow it to set completely. The chilling time is essential for all the layers to firm up and for the flavors to meld together. Once set, slice and serve cold. Enjoy the delightful combination of crunchy, creamy, and fruity in every bite!
Conclusion:
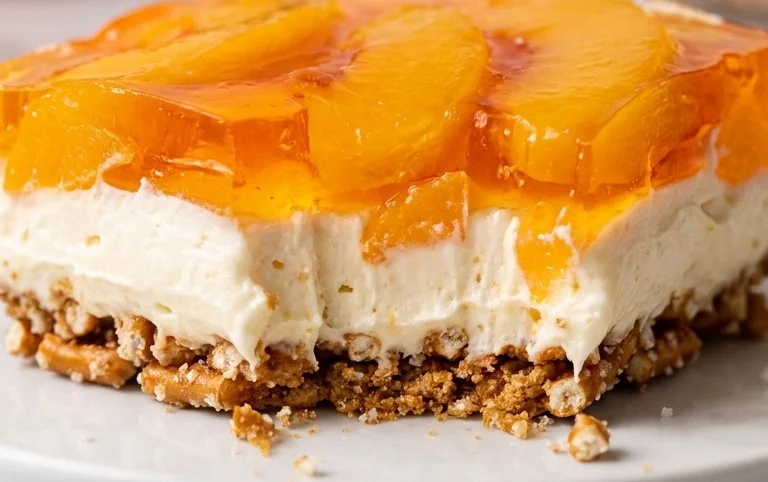
I hope you’re as excited to try this Peach Pretzel Salad Dessert as I am! This recipe truly is a standout because it masterfully blends sweet and salty with creamy and crunchy textures in every delightful bite. The tender, juicy peaches, coupled with the buttery, salty pretzel crust and the luscious cream cheese layer, create a flavor profile that’s both nostalgic and refreshingly unique. It’s the perfect dessert for potlucks, holidays, or simply when you crave something special and satisfying. Don’t be afraid to experiment with the variations I’ve suggested – it’s a forgiving recipe that can be adapted to your preferences. I encourage you to gather your ingredients and give this incredible Peach Pretzel Salad Dessert a go. I’m confident it will become a new favorite in your dessert repertoire!
Frequently Asked Questions:
Can I make this dessert ahead of time?
Absolutely! This Peach Pretzel Salad Dessert is an excellent make-ahead option. I recommend assembling it up to a day in advance and storing it, covered, in the refrigerator. This allows the flavors to meld beautifully, and the pretzel crust will soften slightly but still retain some of its delightful crunch. Just be sure to add any fresh garnish, like extra peach slices or a sprinkle of pretzels, right before serving.
What if I don’t have fresh peaches?
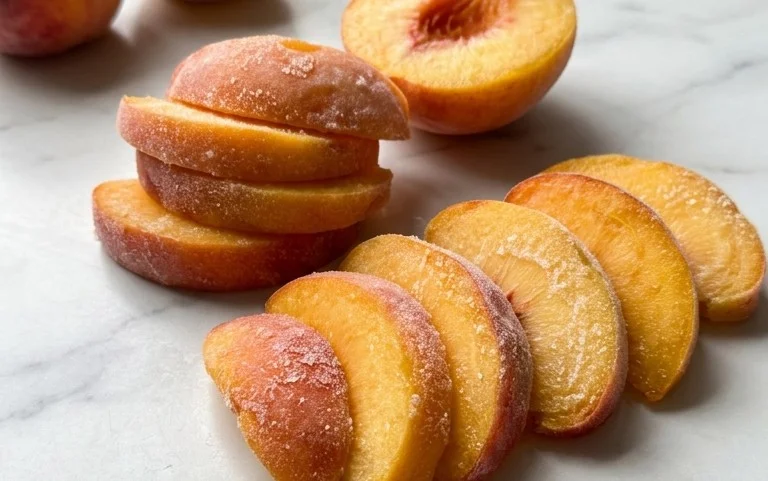
No problem at all! You can easily substitute fresh peaches with canned or frozen peaches. If using canned peaches, drain them thoroughly and pat them dry before layering. For frozen peaches, thaw them completely and drain off any excess liquid. You might even consider adding a touch more sugar to compensate for the sweetness of fresh fruit, depending on your preference.
Are there any nut-free variations?
Yes, this recipe is quite adaptable! The traditional pretzel crust often includes butter and pretzels, which are typically nut-free. However, always double-check the pretzel packagin extractg to ensure no cross-contamination if allergies are a concern. If you’re looking for a completely nut-free option, you could consider a crushed grabeef ham cracker crust or a simple cookie crum extractb crust as an alternative to the pretzel layer.
Peach Pretzel Salad Dessert
A sweet and salty layered dessert featuring a pretzel crust, creamy cheesecake filling, and a refreshing peach gelatin layer.
Ingredients
-
2 1/3 c. boiling water
-
1 6 oz. box peach gelatin
-
4 c. sliced peaches (fresh or canned)
-
2 1/2 c. crushed pretzels
-
3 Tbsp. powdered sugar
-
3/4 c. melted butter
-
1 8 oz. package cream cheese
-
1 c. powdered sugar
-
1 8 oz. carton whipped topping
-
1 pasteurized egg (OPTIONAL)
Instructions
-
Step 1
Combine crushed pretzels, 3 Tbsp. powdered sugar, and 3/4 c. melted butter. Press into a 9×13 inch baking dish. -
Step 2
Beat cream cheese and 1 c. powdered sugar until smooth. Fold in 8 oz. whipped topping and the optional pasteurized egg until well combined. -
Step 3
Spread cream cheese mixture over the pretzel crust. Chill for at least 1 hour. -
Step 4
Dissolve 6 oz. peach gelatin in 2 1/3 c. boiling water. Stir in 4 c. sliced peaches. Let cool slightly. -
Step 5
Pour peach gelatin mixture over the cream cheese layer. Chill until firm, at least 4 hours, or overnight.
Important Information
Nutrition Facts (Per Serving)
It is important to consider this information as approximate and not to use it as definitive health advice.
Allergy Information
Please check ingredients for potential allergens and consult a health professional if in doubt.