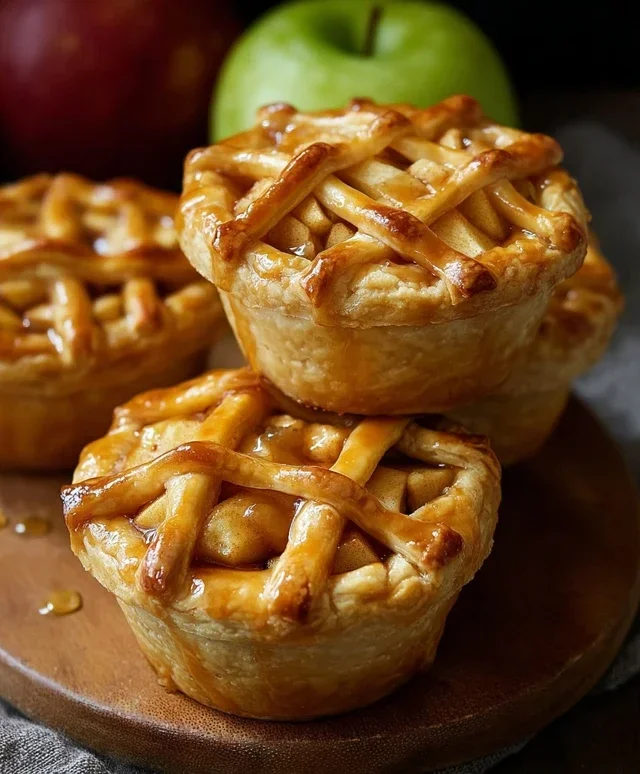
Gooey Butterscotch Nut Bars-Easy & Delicious Treat
Gooey Butterscotch Nut Bars are the kind of treat that makes your kitchen smell like pure happiness. If you’re anything like me, the mere mention of butterscotch evokes feelings of cozy afternoons and the ultimate sweet indulgence. These bars aren’t just another dessert; they’re a warm hug in edible form, a delightful symphony of textures and flavors that consistently disappears from any plate they grace. What truly sets our Gooey Butterscotch Nut Bars apart is the perfect marriage of a tender, crum extractbly base, a molten, caramel-kissed butterscotch filling, and the satisfying crunch of toasted nuts. It’s this balance that makes them utterly irresistible, a testament to simple ingredients creating extraordinary magic. Get ready to impress yourself and everyone you share these with!
Gooey Butterscotch Nut Bars
Get ready to indulge in a treat that’s pure, unadulterated bliss! These Gooey Butterscotch Nut Bars are a symphony of sweet, buttery, and nutty flavors, all baked into a chewy, irresistible bar. Perfect for potlucks, bake snon-alcoholic ales, or simply treating yourself after a long day, these bars are surprisingly easy to make and guaranteed to disappear fast. The magic happens with a simple sugar cookie base, a creamy butterscotch swirl, and a generous scattering of crunchy roasted nuts. Trust me, one bite and you’ll be hooked.
Ingredients:
Instructions:
Preparing the Base: A Foundation of Sweetness
The first step to creating these delightful bars is to prepare the cookie base. In a medium-sized mixing bowl, combine the contents of the sugar cookie mix with the softened butter and the egg. I like to use softened butter because it incorporates more easily into the mix, leading to a smoother, more uniform dough. If your butter is too hard, you can gently warm it for a few seconds in the microwave, but be careful not to melt it completely – we want it pliable, not liquid. Mix everything together until it forms a thick, somewhat crum extractbly dough. Don’t overmix; just combine until no dry streaks of cookie mix remain. This dough will be quite stiff, which is exactly what we want.
Now, take your prepared 9×13 inch baking pan. I highly recommend greasing it well with butter or a baking spray, and then lining it with parchment paper, leaving an overhang on the sides. This parchment paper sling is a lifesaver when it comes to removing the bars cleanly from the pan after they’ve cooled. Once the pan is prepped, press about two-thirds of the sugar cookie dough evenly into the bottom of the pan. You want a nice, consistent layer. It can be a little sticky, so wetting your fingers slightly with water or using a flat-bottomed glass can help to get a smooth, even surface without tearing the dough. Reserve the remaining one-third of the dough for later.
Crafting the Gooey Butterscotch Layer: Pure Indulgence
Next, we move on to the star of the show – the glorious butterscotch layer. In a small saucepan over low heat, combine the unwrapped caramels and the evaporated milk. Stir constantly. Evaporated milk is key here; it adds a wonderful richness and helps create that smooth, flowing caramel consistency. It’s important to use low heat and keep stirring to prevent the caramels from scorching or sticking to the bottom of the pan. Gradually, the caramels will begin extract to melt and blend with the milk, transforming into a smooth, glossy sauce. This process usually takes about 5-10 minutes. Once the caramel is completely melted and smooth, remove the saucepan from the heat.
To this luscious caramel mixture, we’re going to add the instant butterscotch pudding mix and the vanilla extract. The instant pudding mix doesn’t require any cooking here; it acts as a thickener and intensifies the butterscotch flavor. Stir it in vigorously until it’s fully incorporated and the mixture is thick and creamy. You’ll notice it starts to set up fairly quickly. This is where the magic truly happens, creating that signature gooeyness that makes these bars so addictive. Let this mixture cool slightly for about 5-10 minutes while you get the nuts and chips ready.
Assembling the Dream: Nuts, Chips, and the Final Touch
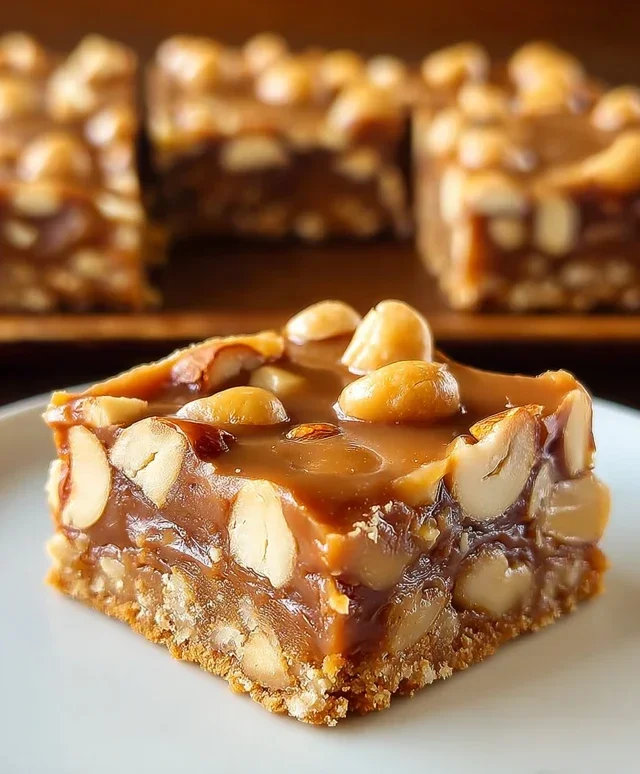
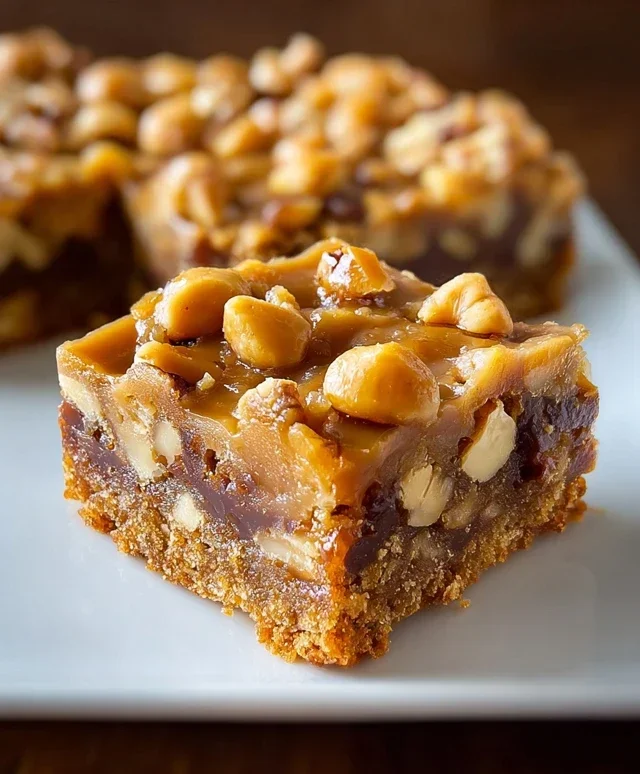
With the butterscotch layer slightly cooled, it’s time to bring everything together. Scatter the roasted macadamia nuts and roasted cashews evenly over the cookie base in the baking pan. These nuts provide a fantastic textural contrast and a rich, nutty flavor that complements the sweet butterscotch perfectly. Don’t be shy with the nuts; they are a crucial component of these bars! Next, sprinkle the butterscotch chips over the nuts. The chips will melt slightly during baking, adding even more pockets of intense butterscotch flavor and a beautiful sheen to the finished bars.
Now, take the reserved one-third of the sugar cookie dough and crum extractble it evenly over the top of the nuts and butterscotch chips. You’re not trying to create a solid top layer, but rather a scattered, rustic topping. This will bake into delightful little crunchy pockets interspersed with the gooey filling. This step adds another layer of cookie goodness and visual appeal.
Baking to Perfection: The Moment of Truth
Now it’s time to bake these beauties. Place the pan in a preheated oven at 350 degrees Fahrenheit (175 degrees Celsius). Bake for approximately 30-35 minutes, or until the edges are golden brown and the center appears set but still slightly gooey. It’s important not to overbake, as we want that signature gooey texture. The butterscotch layer will continue to set up as it cools, so a slightly soft center when it comes out of the oven is perfectly acceptable.
Cooling and Cutting: Patience is a Virtue
Once baked, remove the pan from the oven and let the bars cool completely in the pan on a wire rack. This is arguably the hardest part – waiting! Allowing them to cool fully is essential for them to set properly and for clean slicing. If you try to cut them while they are still warm, the gooey center will likely ooze out everywhere, making for a messy (though still delicious!) experience. Once completely cooled, use the parchment paper overhang to carefully lift the entire slab out of the pan. Then, use a sharp knife to cut them into squares or bars. For the cleanest cuts, you can run your knife under hot water and dry it between each cut. Enjoy these incredibly satisfying Gooey Butterscotch Nut Bars!
Conclusion:
I truly hope you give these Gooey Butterscotch Nut Bars a try! They are, in my opinion, the ultimate treat. The irresistible combination of a rich, buttery base, a wonderfully gooey butterscotch layer, and the satisfying crunch of toasted nuts creates a flavor and texture sensation that’s hard to beat. These bars are perfect for any occasion, whether it’s a casual afternoon snack, a bake snon-alcoholic ale centerpiece, or a delightful dessert to share with loved ones. The aroma alone as they bake is enough to make your mouth water, and the taste? Pure bliss!
For serving, I love them slightly warm, perhaps with a scoop of vanilla ice cream for an extra indulgent experience. They also travel exceptionally well, making them ideal for potlucks and picnics. Don’t be afraid to get creative with variations! You could swap out the walnuts for pecans, almonds, or even macadamia nuts for a different nutty profile. A sprinkle of sea salt on top before baking really elevates the sweetness, or you could even add a swirl of dark chocolate to the butterscotch layer for a decadent twist.
This recipe for Gooey Butterscotch Nut Bars is designed to be both approachable and incredibly rewarding. So gather your ingredients, put on some music, and enjoy the process of creating these magnificent bars. I’m confident you’ll be thrilled with the results and have a new go-to recipe for delicious, crowd-pleasing treats!
Frequently Asked Questions:
Can I make these bars ahead of time?
Absolutely! These Gooey Butterscotch Nut Bars actually benefit from being made a day in advance. This allows the flavors to meld beautifully and the texture to fully set, resulting in even more deliciousness. Store them in an airtight container at room temperature.
What if I don’t have butterscotch chips?
If you can’t find butterscotch chips, you can certainly substitute them with milk chocolate or even caramel chips. The overall flavor profile will change slightly, but they will still be wonderfully delicious and gooey. You might need to adjust the baking time slightly depending on the type of chips you use.
How should I store leftover bars?
To keep your Gooey Butterscotch Nut Bars fresh and delicious, store them in an airtight container at room temperature for up to 3-4 days. If you live in a very warm climate, you might consider refrigerating them, but allow them to come to room temperature before serving for the best texture.
Gooey Butterscotch Nut Bars
Decadent bars featuring a chewy butterscotch base loaded with nuts and chips, made easy with a sugar cookie mix foundation.
Ingredients
-
1 package (17.5 oz) sugar cookie mix
-
1 package (3.4 oz) instant butterscotch pudding mix
-
1/2 cup butter, softened
-
1 egg
-
1 package (14 oz) caramels, unwrapped
-
1/2 cup evaporated milk
-
1 cup roasted macadamia nuts
-
1 cup roasted cashews
-
1 teaspoon vanilla extract
-
1 cup butterscotch chips
Instructions
-
Step 1
Preheat oven to 350°F (175°C). Grease and flour a 9×13 inch baking pan. -
Step 2
In a large bowl, combine sugar cookie mix, pudding mix, softened butter, and egg. Mix until well combined, forming a dough. -
Step 3
Press half of the dough evenly into the bottom of the prepared baking pan. -
Step 4
In a microwave-safe bowl, combine unwrapped caramels and evaporated milk. Microwave in 30-second intervals, stirring between each, until smooth and melted. Stir in vanilla extract. -
Step 5
Spread the melted caramel mixture evenly over the dough base. Sprinkle roasted macadamia nuts, roasted cashews, and butterscotch chips over the caramel layer. -
Step 6
Crumble the remaining half of the dough over the topping. Bake for 25-30 minutes, or until the topping is golden brown and the caramel is bubbly. -
Step 7
Let cool completely in the pan before cutting into bars.
Important Information
Nutrition Facts (Per Serving)
It is important to consider this information as approximate and not to use it as definitive health advice.
Allergy Information
Please check ingredients for potential allergens and consult a health professional if in doubt.