Crispy Zucchini Chips – Easy Healthy Snack
Crispy Zucchini Chips are an absolute game-changer, and I’m so excited to share my favorite recipe with you today! Forget those soggy, disappointing vegetable attempts of the past. These aren’t your average veggie snacks; they’re a revelation. We all crave that satisfying crunch, that addictive salty bite, and these crispy zucchini chips deliver it in spades. What makes them so special? It’s all about the technique, transforming humble zucchini into impossibly light and airy, golden-brown delights that disappear faster than you can say “snack time.” They’re perfect for guilt-free munching, an impressive appetizer, or even a delightful side dish. Get ready to fall in love with this simple yet stunning way to enjoy zucchini.

Crispy Zucchini Chips
Looking for a way to use up those extra zucchinis? Or perhaps you’re just craving a healthy, crunchy snack that actually tastes delicious? Well, you’ve come to the right place! These Crispy Zucchini Chips are incredibly easy to make, remarkably satisfying, and a fantastic alternative to potato chips. They’re perfect for snacking on their own, dipping into your favorite sauce, or even as a fun side dish. The beauty of these chips lies in their simplicity – a few fresh ingredients and a little bit of oven magic transform humble zucchini into a crispy delight. I love making a big batch because they disappear so quickly in my house! Get ready to impress yourself (and anyone lucky enough to share these with you) with this simple yet sensational recipe.
Ingredients:
Making Your Zucchini Chips: Step-by-Step
The process of making these chips is straightforward, but attention to a few key details will ensure you achieve that perfect crispiness. Don’t skip the steps, and you’ll be rewarded with a snack that’s both healthy and addictive.
Step 1: Preparing the Zucchini
Begin extract by thoroughly washing your zucchinis. Then, it’s time to slice them. For the crispiest chips, it’s crucial to get them nice and thin. A mandoline slicer is your best friend here, as it will ensure uniform thickness, which is key for even cooking. If you don’t have a mandoline, a sharp knife and a steady hand will work, but aim for slices that are about 1/16th of an inch thick – almost translucent. Thicker slices will likely result in softer, more roasted zucchini rather than truly crispy chips. Once sliced, you’ll notice a lot of moisture. This is where the magic of dehydration comes in, and we want to encourage as much of that water to escape as possible.
Step 2: Drawing Out Moisture
This is arguably the most important step for achieving maximum crispiness. After slicing your zucchinis, spread them out in a single layer on paper towels. Generously sprinkle them with about half of the sea salt. Let them sit for at least 15-30 minutes. You’ll be amazed at how much liquid they release! After the resting period, use more paper towels to gently pat each zucchini slice completely dry. Press down firmly to remove as much surface moisture as possible. The more moisture you remove at this stage, the crispier your chips will become. Don’t rush this part; it’s a vital investment in your crispy chip future.
Step 3: Seasoning for Flavor
Now that our zucchini slices are wonderfully dry, it’s time to bring on the flavor! In a medium bowl, toss the dried zucchini slices with the olive oil. You want just enough oil to lightly coat each slice, ensuring the seasonings adhere well. Add the remaining sea salt, garlic powder, smoked paprika, and black pepper to the bowl. Gently toss everything together, making sure each slice is evenly coated. The smoked paprika adds a lovely subtle smoky depth that’s incredibly moreish. If you love a bit of heat, you could also add a pinch of cayenne pepper at this stage. Be mindful not to over-oil; too much oil can prevent the chips from crisping up properly.
Step 4: Arrangin extractg for Optimal Baking
Preheat your oven to a relatively low temperature, around 225°F (107°C). This low and slow approach is essential for dehydrating the zucchini rather than just baking it. Line two baking sheets with parchment paper. This will prevent the chips from sticking and make cleanup a breeze. Arrange the seasoned zucchini slices in a single layer on the prepared baking sheets, ensuring they don’t overlap. Overlapping will steam the chips instead of allowing them to crisp up. If you have too many slices for two sheets, it’s better to bake in batches. Proper spacing is critical for air circulation, which is what facilitates the crisping process.
Step 5: The Waiting Game and Checking for Crispness
Bake for approximately 1 to 1.5 hours. The exact time will depend on the thickness of your slices and your oven’s calibration. Around the 1-hour mark, start checking them. They should be starting to look slightly shrunken and feel firm to the touch. For the crispiest results, you want to bake them until they are golden brown and brittle. Carefully flip the chips halfway through the baking time to ensure even drying and browning on both sides. If some slices are done before others, remove them to prevent them from burning. You’re looking for that satisfying snap when you break one. Once they’re all beautifully crisp, remove them from the oven.
Step 6: Cooling and Serving
Let the zucchini chips cool completely on the baking sheets or on a wire rack. As they cool, they will continue to crisp up. This cooling period is essential for achieving that perfect texture. Once completely cooled, if you like, you can sprinkle them with grated parmesan cheese while they are still slightly warm, allowing it to melt a little. These are best enjoyed fresh, but they can be stored in an airtight container at room temperature for a few days. However, I guarantee they won’t last that long! Enjoy your homemade, guilt-free crunchy snack!
Conclusion:
So there you have it – your guide to making incredibly delicious and satisfying Crispy Zucchini Chips right at home! This recipe is a game-changer because it transforms a humble vegetable into a crave-worthy snack that’s surprisingly easy to achieve. Forget soggy or bland, these chips deliver that perfect crunch you’re looking for, making them ideal for any occasion. Whether you need a healthy appetizer for a party, a fun side dish for a family meal, or simply a guilt-free munchie to enjoy while loungin extractg, these Crispy Zucchini Chips are your answer. I highly encourage you to give this recipe a try; you’ll be amazed at how simple it is to create such a delightful treat.
For serving, these chips are fantastic on their own, but they also pair wonderfully with a variety of dips. Think creamy ranch, zesty garlic aioli, or even a spicy marinara for a Mediterranean twist. If you’re feeling adventurous, consider experimenting with different seasonings. Smoked paprika, chili powder, or even a sprinkle of nutritional yeast for a cheesy flavor can elevate these already delicious Crispy Zucchini Chips even further. Don’t be afraid to get creative and make them your own!
Frequently Asked Questions:
Can I bake these instead of frying them?
Absolutely! Baking is a fantastic alternative for achieving a lighter, equally crispy result. Simply arrange your seasoned zucchini slices on a baking sheet lined with parchment paper and bake at around 400°F (200°C) for 20-25 minutes, flipping halfway through, until golden and crisp. You might need to adjust baking time slightly depending on your oven.
What’s the best way to get them extra crispy?
The key to super crispy zucchini chips lies in removing as much moisture as possible from the zucchini before cooking. After slicing, I recommend patting them thoroughly dry with paper towels or even letting them sit on a paper towel-lined plate for about 15-20 minutes to air dry. Ensuring your oil is hot enough when frying, or your oven is at the correct temperature when baking, also plays a crucial role.
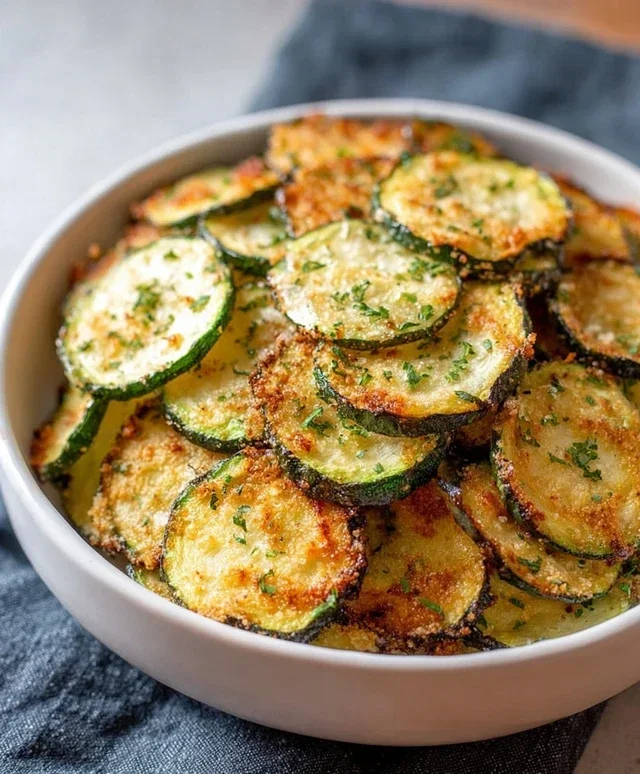
Crispy Zucchini Chips
Thinly sliced zucchini baked until golden brown and crispy, seasoned with savory spices and finished with a sprinkle of parmesan.
Ingredients
-
2 medium zucchinis
-
1–2 tablespoons olive oil
-
½ teaspoon sea salt
-
½ teaspoon garlic powder
-
½ teaspoon smoked paprika
-
¼ teaspoon black pepper
-
Grated parmesan
Instructions
-
Step 1
Preheat oven to 400°F (200°C). -
Step 2
Wash and trim the ends of the zucchinis. Slice them very thinly, about 1/16-inch thick, using a mandoline or a sharp knife. -
Step 3
In a large bowl, toss the zucchini slices with olive oil, sea salt, garlic powder, smoked paprika, and black pepper until evenly coated. -
Step 4
Arrange the zucchini slices in a single layer on baking sheets lined with parchment paper. Do not overcrowd the pans. -
Step 5
Bake for 15-20 minutes, flipping halfway through, until the edges are browned and the chips are crispy. Watch closely to prevent burning. -
Step 6
Remove from oven and immediately sprinkle with grated parmesan cheese. Let cool slightly before serving.
Important Information
Nutrition Facts (Per Serving)
It is important to consider this information as approximate and not to use it as definitive health advice.
Allergy Information
Please check ingredients for potential allergens and consult a health professional if in doubt.