Keto Cheesecake In A Mug – Quick & Easy Treat
Keto cheesecake in a mug is your sweet salvation when that dessert craving hits hard but you’re sticking to your low-carb lifestyle. Forget complicated baking, the mess of a full-sized cheesecake, and the sugar crash that follows. We’re talking about pure, unadulterated cheesecake bliss, ready in minutes, and perfectly portioned for a single serving of indulgence. Who doesn’t love the creamy, tangy goodness of classic cheesecake? It’s a universally adored treat, and this mug version captures all that magic without derailing your keto goals. What makes this keto cheesecake in a mug so special is its incredible simplicity and speed. It’s the ultimate shortcut to satisfying your sweet tooth with decadent flavor and a satisfyingly smooth texture, all while keeping your carb count in check. Get ready to discover your new go-to dessert!
Keto Cheesecake In a Mug
Craving that rich, creamy indulgence of cheesecake but sticking to your ketogenic lifestyle? Look no further! This Keto Cheesecake In a Mug is your instant gratification solution. Forget hours of baking and worrying about carb counts; this recipe delivers that classic cheesecake flavor and texture in just minutes, all from the convenience of your microwave. It’s perfect for a solo treat, a quick dessert after a busy day, or whenever that sweet craving strikes without derailing your diet. We’re using simple, keto-friendly ingredients that come together effortlessly to create a surprisingly decadent dessert.
This recipe is designed for single servings, making portion control a breeze. The beauty of this mug cake is its adaptability. While the base recipe is fantastic on its own, you can easily customize it with your favorite keto-friendly toppings. Think a dollop of sugar-free whipped cream, a sprinkle of fresh berries, or a drizzle of sugar-free chocolate sauce. The possibilities are endless, but even plain, it’s pure bliss. Let’s dive into what you’ll need to create this delightful treat.
Ingredients:
Instructions:
Step 1: Prepare Your Mug and Ingredients
Before we begin extract mixing, ensure your cream cheese is properly softened. This is a crucial step for achieving a smooth and lump-free batter. If you forgot to take it out of the fridge in advance, you can microwave it in very short bursts (10-second intervals) until it’s pliable, but be careful not to melt it. A room-temperature egg also incorporates much better into batters, preventing any “cooked egg” streaks in your final cheesecake. Grab your favorite microwave-safe mug. A standard 10-12 ounce mug works best. Ensure it’s deep enough to accommodate the batter as it rises slightly during microwaving.
Step 2: Cream the Base
In your chosen mug, combine the softened cream cheese and the sour cream. Using a fork or a small whisk, cream these two ingredients together until they are exceptionally smooth and well combined. You want to break down any lumps in the cream cheese entirely. This smooth base is what will give our cheesecake its characteristic creamy texture. Take your time here; this step sets the foundation for a perfect cheesecake. Once you have a smooth, homogenous mixture, add the powdered monkfruit sweetener. Continue to mix until the sweetener is fully incorporated and the mixture is creamy and slightly fluffy. The powdered sweetener dissolves more easily than granular, contributing to a smoother final product.
Step 3: Incorporate the Egg and Vanilla
Now it’s time to add the egg and vanilla extract. Crack the room-temperature egg directly into the mug with the cream cheese mixture. Add the vanilla extract. Whisk everything together vigorously with your fork or whisk until the egg is completely incorporated and the batter is smooth and uniform in color. You should no longer see distinct streaks of egg yolk or white. The batter will become slightly thicker and glossier at this stage. Ensure you scrape the sides and bottom of the mug to get all the ingredients mixed in thoroughly. Overmixing isn’t a huge concern here since we’re not developing gluten, but thorough mixing is key for an even bake.
Step 4: Microwave and Cook
Place your mug in the center of your microwave. Microwave on high power for approximately 60 to 90 seconds. The cooking time can vary significantly depending on the wattage of your microwave. Start with 60 seconds and check for doneness. The cheesecake should be mostly set around the edges but may still appear slightly soft in the center. It will continue to cook and firm up as it cools. If it’s still very liquidy, microwave in additional 15-second increments, checking after each interval, until it’s mostly set. Be careful not to overcook, as this can lead to a rubbery texture. The goal is a creamy, custard-like consistency.
Step 5: Cool and Enjoy
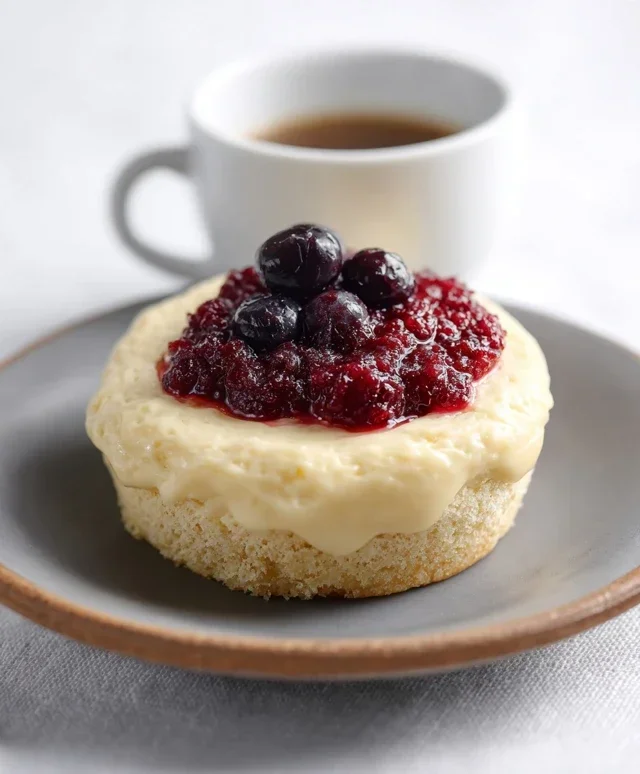
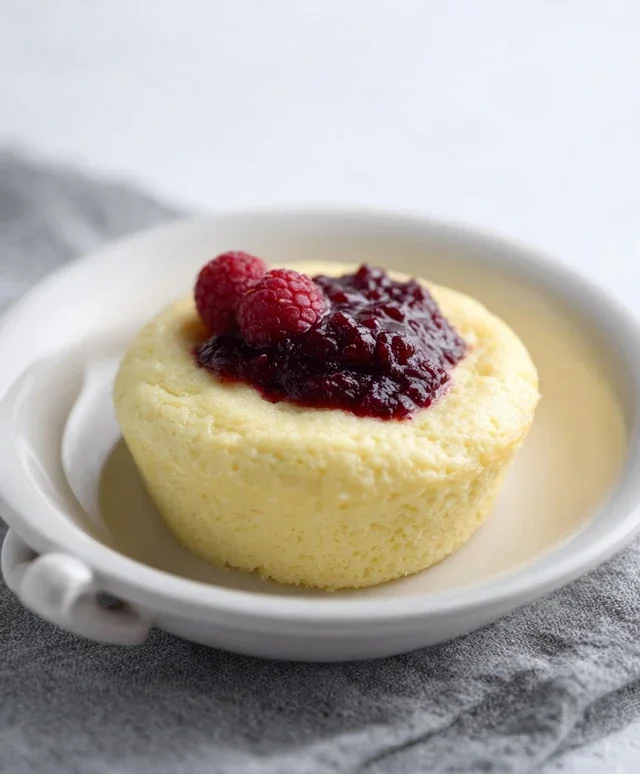
Once microwaved, carefully remove the hot mug from the microwave using oven mitts or a towel. Let your Keto Cheesecake In a Mug cool in the mug for at least 5 to 10 minutes. This cooling period is crucial for the cheesecake to finish setting and for the flavors to meld. You can enjoy it warm, or for a more traditional cheesecake experience, you can let it cool completely and even chill it in the refrigerator for a firmer texture. Top with your favorite keto-friendly toppings like a few fresh raspberries, a dusting of cinnamon, or a spoonful of sugar-free whipped cream. Prepare to be amazed at how such a simple recipe can yield such a satisfying keto dessert!
Conclusion:
So there you have it – the ultimate guide to crafting a delicious Keto Cheesecake In a Mug! This recipe truly is a game-changer for anyone craving that creamy, indulgent cheesecake experience without the carb load. It’s incredibly quick to prepare, uses minimal ingredients, and delivers that satisfyingly rich flavor and texture we all love. Plus, the single-serving nature makes it perfect for portion control and satisfying those dessert cravings without derailing your keto lifestyle.
I love serving my Keto Cheesecake In a Mug warm, straight from the microwave, but it’s also fantastic chilled. For serving suggestions, try topping it with a dollop of full-fat whipped cream, a sprinkle of keto-friendly chocolate chips, or a handful of fresh berries like raspberries or blueberries. You can also get creative with variations! Experiment with adding a touch of lemon zest for a brighter flavor, a dash of cinnamon for warmth, or even a small amount of sugar-free caramel drizzle. Don’t be afraid to make it your own!
I genuinely encourage you to give this Keto Cheesecake In a Mug recipe a try. It’s so simple yet so rewarding. You’ll be amazed at how easily you can enjoy a decadent dessert while sticking to your ketogenic goals. Happy baking (or, rather, microwaving)!
Frequently Asked Questions:
Can I make this recipe ahead of time?
While this recipe is designed for immediate enjoyment, you can technically prepare the batter ahead of time and store it in the refrigerator for up to a day. However, I find the texture is best when microwaved fresh. The crust might also soften if left to sit too long.
What can I use if I don’t have cream cheese?
Cream cheese is pretty essential for the classic cheesecake flavor and texture. However, if you’re in a pinch, you could experiment with a combination of mascarpone cheese and a touch of sour cream, but the results may vary slightly in richness and tang.
Keto Cheesecake In a Mug
A quick and easy keto-friendly cheesecake made in a mug, perfect for a single-serving sweet treat.
Ingredients
-
3 1/2 tbsp cream cheese (softened, 52g)
-
1/2 tbsp sour cream (7g)
-
2 tbsp powdered monkfruit sweetener (20g)
-
1 egg (room temperature)
-
1/4 tsp vanilla extract
Instructions
-
Step 1
In a microwave-safe mug, combine the softened cream cheese and sour cream. Mix until smooth. -
Step 2
Stir in the powdered monkfruit sweetener until well combined. -
Step 3
Add the egg and vanilla extract. Whisk everything together until smooth and no lumps remain. -
Step 4
Microwave on high for 1 minute and 30 seconds. The cheesecake should be set but slightly jiggly in the center. -
Step 5
Let it cool in the mug for at least 5 minutes before enjoying. -
Step 6
Optional: Top with your favorite keto-friendly berries or sugar-free whipped cream.
Important Information
Nutrition Facts (Per Serving)
It is important to consider this information as approximate and not to use it as definitive health advice.
Allergy Information
Please check ingredients for potential allergens and consult a health professional if in doubt.