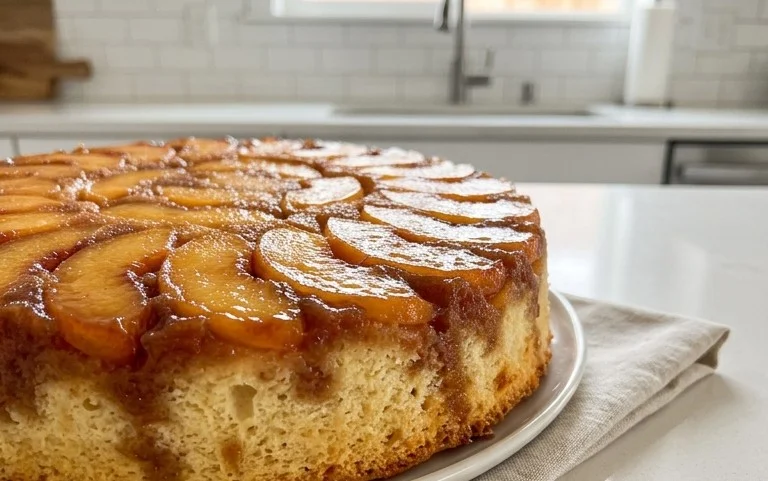
Sticky Coconut Cake- moist delicious recipe
Sticky Coconut Cake is more than just a dessert; it’s a warm hug in edible form. If you’ve ever craved that perfect balance of sweet, moist, and utterly comforting, then you’re in for a treat. This isn’t just any cake; it’s a symphony of tropical flavors that dances on your taste buds. The rich, buttery crum extractb infused with fragrant coconut milk, crowned with a luscious, glistening caramel glaze, is what makes this Sticky Coconut Cake a perennial favorite. It’s the kind of dessert that brings smiles to faces, perfect for celebrations or simply for elevating an ordinary afternoon. The magic lies in its simplicity, yet the result is something truly extraordinary. Get ready to fall in love with this irresistible Sticky Coconut Cake.
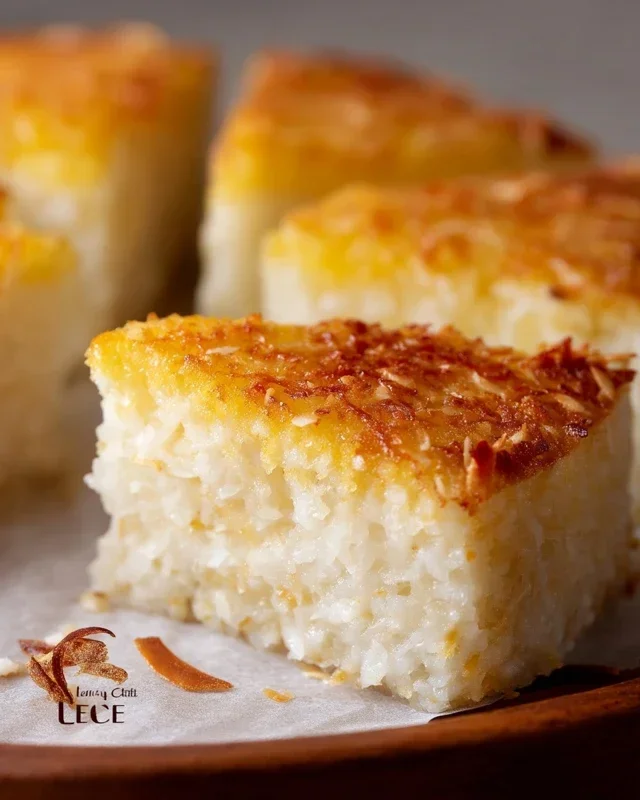
Sticky Coconut Cake
There’s something incredibly comforting about a warm slice of cake, especially one bursting with the tropical, creamy essence of coconut. This Sticky Coconut Cake is precisely that – a delightfully chewy, moist, and intensely flavored treat that will transport your taste buds straight to a sun-drenched beach. It’s a deceptively simple cake to make, relying on pantry staples and a few key ingredients to achieve its signature texture and aroma. The combination of glutinous rice flour and full-fat coconut milk is the secret to its irresistible chegrape juicess, while the shredded coconut provides pockets of delightful sweetness and texture throughout. I love this cake because it’s not overly sweet, allowing the natural flavors of coconut to truly shine. It’s perfect for an afternoon tea, a simple dessert after dinner, or even as a sweet breakfast option when you fancy a little indulgence. Let’s get baking!
Ingredients:
Cake Preparation
1. Creaming the Egg Yolks and Sugar: In a large mixing bowl, I start by creaming together the 2 egg yolks with the 1¼ cup of granulated sugar. This is a crucial step for achieving a light and airy cake batter. I whisk vigorously, either with a hand mixer or a sturdy whisk, until the mixture turns pnon-alcoholic ale yellow and becomes noticeably lighter and fluffier. This process incorporates air into the yolks and sugar, which will help the cake rise and contribute to its tender crum extractb. Don’t rush this; it might take a good 3-5 minutes of consistent beating. You’ll see the sugar crystals start to dissolve, and the mixture will develop a ribbon-like consistency when you lift the whisk.
2. Incorporating the Wet Ingredients: Next, I gradually add the 2¼ cups of full-fat canned coconut milk to the egg yolk and sugar mixture. I pour it in slowly while continuing to whisk, ensuring it’s well combined. It’s important to use full-fat coconut milk for this recipe, as it contributes significantly to the cake’s rich, creamy texture and moisture. Low-fat versions won’t yield the same decadent results. After the coconut milk is incorporated, I stir in the 1 teaspoon of vanilla extract. Vanilla is a wonderful flavor enhancer, and it beautifully complements the tropical notes of the coconut. The mixture should now be smooth and a beautiful pnon-alcoholic ale cream color.
3. Adding the Dry Ingredients: Now it’s time to introduce the dry ingredients. I add the 3 cups of shredded sweetened coconut and the 1½ cup of glutinous rice flour to the wet mixture. I like to sift the glutinous rice flour, if possible, to prevent any lumps from forming, though it’s not strictly necessary. Gently fold these ingredients into the batter using a spatula. You want to mix just until everything is combined and no dry streaks of flour remain. Overmixing at this stage can make the cake tough, so a gentle hand is key. The batter will become quite thick and sticky at this point, which is exactly what we want for this cake. The shredded coconut will distribute throughout, promising those delightful bursts of flavor and chew.
4. Whipping the Egg Whites: In a separate, clean, and dry bowl, I whip the 2 egg whites until they form stiff peaks. It’s essential that this bowl and the whisk are completely free of any grease or yolk, as this will prevent the egg whites from whipping up properly. I start whisking on a low speed and gradually increase to high. The egg whites will first become foamy, then soft peaks will form, and finally, when you lift the whisk, the peaks should stand up straight without collapsing. This is called stiff peaks. This airy component is what will give our sticky cake a lighter texture and help it rise.
5. Folding and Baking: The final step in preparing the batter is to gently fold the whipped egg whites into the thick coconut mixture. I do this in two or three additions, using a spatula. The goal is to incorporate the air from the egg whites without deflating them. I use a cut-and-fold motion, gently lifting the batter from the bottom of the bowl and folding it over the egg whites. This process ensures that the air is preserved and evenly distributed, leading to a tender and slightly fluffy cake. Once the egg whites are fully incorporated and the batter is homogenous, I pour it into a greased and floured baking pan. I usually bake this cake in a 9×13 inch pan at 350°F (175°C) for about 30-40 minutes, or until a toothpick inserted into the center comes out clean. The top should be golden brown and slightly firm to the touch. Allow it to cool in the pan for a bit before inverting and serving. The aroma while it bakes is absolutely divine!
Conclusion:
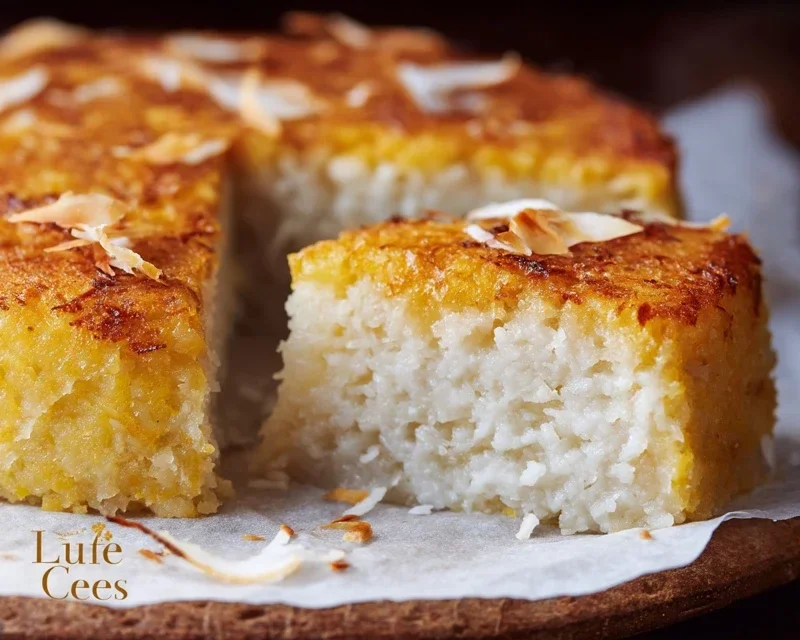
I hope you’re as excited as I am to try this Sticky Coconut Cake recipe! It truly is a showstopper, boasting an irresistible combination of moist, tender cake infused with the sweet, tropical essence of coconut, all drenched in a decadent, gooey coconut caramel sauce. The contrasting textures and the wonderfully aromatic flavors make it a memorable dessert perfect for any occasion, from casual get-togethers to more special celebrations. It’s surprisingly straightforward to make, too, meaning you can easily bring a taste of paradise into your own kitchen.
Serving this sticky coconut cake is an absolute delight. It’s divine on its own, allowing the rich coconut flavors to shine. For an extra touch of indulgence, I love pairing it with a dollop of lightly whipped cream, a scoop of vanilla bean ice cream, or even a drizzle of extra caramel sauce. If you’re feeling adventurous with variations, consider adding some toasted coconut flakes on top for added crunch and visual appeal, or perhaps a hint of lime zest to the cake batter for a brighter, zesty note. Don’t be afraid to experiment and make this recipe your own! I genuinely encourage you to give this sticky coconut cake a go – I’m confident you’ll be delighted with the results.
Frequently Asked Questions:
Can I make this sticky coconut cake ahead of time?
Absolutely! You can bake the cake a day in advance and store it at room temperature, covered loosely. The coconut caramel sauce is best made closer to serving time for optimal gooeyness, but you can gently warm any leftovers if needed. This makes it a great option for entertaining.
What kind of coconut should I use?
For the best flavor and texture, I recommend using unsweetened shredded coconut for the cake batter and sweetened shredded coconut for the topping. Full-fat coconut milk is also crucial for the richness of both the cake and the sauce.
My caramel sauce isn’t very sticky. What went wrong?
Ensure you’re cooking the sugar mixture long enough to reach the caramel stage without burning. The butter and coconut milk should be added carefully and stirred until smooth and thickened. Overcooking can make it too hard, and undercooking will leave it too thin.
Sticky Coconut Cake
A moist and flavorful cake made with coconut milk and glutinous rice flour, topped with sweet shredded coconut.
Ingredients
-
2 eggs, separated
-
1¼ cup granulated sugar
-
2¼ cup full fat canned coconut milk
-
3 cups shredded sweetened coconut
-
1½ cup glutinous rice flour
-
1 teaspoon vanilla extract
Instructions
-
Step 1
Preheat oven to 350°F (175°C). Grease and flour a 9×13 inch baking pan. -
Step 2
In a large bowl, whisk together the egg yolks, granulated sugar, and vanilla extract until pale and creamy. -
Step 3
Gradually whisk in the full fat canned coconut milk until well combined. -
Step 4
In a separate bowl, combine the glutinous rice flour and 2 cups of the shredded sweetened coconut. Add this dry mixture to the wet ingredients and stir until just combined. Do not overmix. -
Step 5
In a clean bowl, beat the egg whites until stiff peaks form. Gently fold the beaten egg whites into the cake batter. -
Step 6
Pour the batter into the prepared baking pan. Sprinkle the remaining 1 cup of shredded sweetened coconut evenly over the top. -
Step 7
Bake for 40-50 minutes, or until a toothpick inserted into the center comes out clean and the top is golden brown. -
Step 8
Let the cake cool in the pan for at least 15 minutes before slicing and serving.
Important Information
Nutrition Facts (Per Serving)
It is important to consider this information as approximate and not to use it as definitive health advice.
Allergy Information
Please check ingredients for potential allergens and consult a health professional if in doubt.