Perfect Ajitama Ramen Eggs- Flavorful Marinated Eggs
Ramen eggs, or ajitama, are a culinary revelation that elevate any bowl of noodles from delicious to downright divine. There’s a reason these marinated masterpieces are so universally adored. That perfect, jammy yolk, bathed in a savory, umami-rich marinade – it’s pure comfort and a textural marvel. What makes ramen eggs so special? It’s the alchemy of a simple boiled egg transformed into something truly extraordinary with just a few key ingredients and a little bit of patience. Forget bland, boring boiled eggs; these are a flavor bomb waiting to explode in your mouth. They add a luxurious depth and a satisfying chew that cuts through the broth and noodles beautifully. I can’t imagin extracte a proper bowl of ramen without these glorious, golden-centered ramen eggs.
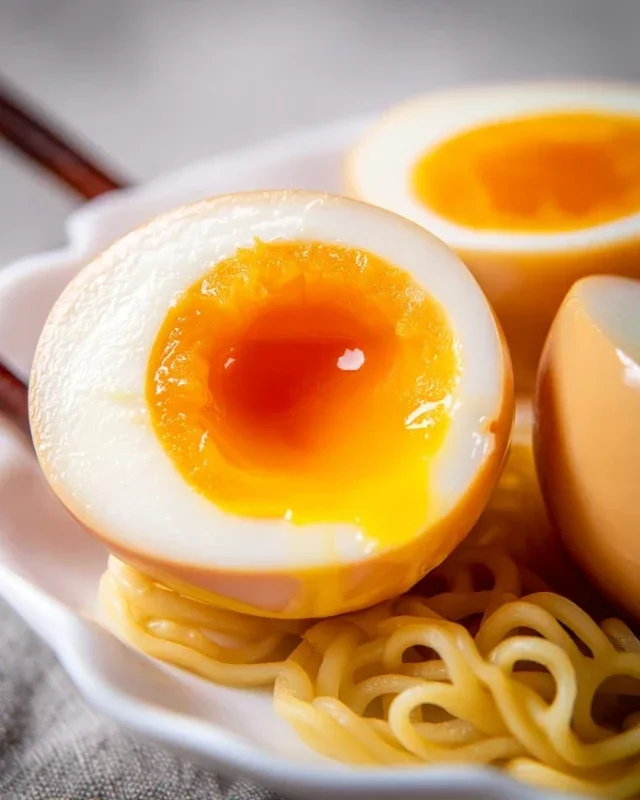
Ramen Eggs (Ajitama)
There’s something truly magical about the perfect ramen egg. That luscious, jammy yolk, nestled within a tender, marinated white, is the crowning glory of any bowl of ramen. Often referred to as “ajitama” (flavored egg) in Japanese, these marinated eggs are surprisingly simple to make at home, transforming ordinary eggs into an extraordinary delicacy. Forget the slightly rubbery, overcooked eggs you might have encountered; with this recipe, you’ll achieve ramen egg perfection every single time. The key lies in achieving the ideal soft-boiled egg consistency and then allowing it to soak in a deeply flavorful marinade. These eggs are fantastic not just in ramen, but also as a topping for rice bowls, on salads, or even just enjoyed on their own. Let’s dive in and create some deliciousness!
Ingredients:
*Note on egg freshness: While any large eggs will work, fresher eggs are slightly harder to peel after boiling. If you can, use eggs that are a few days old. This will make the peeling process much smoother.
Instructions:
Boiling the Eggs: Achieving the Perfect Soft-Boil
The first crucial step to making amazing ramen eggs is to achieve the perfect soft-boiled consistency. I like to bring a pot of water to a rolling boil. Once boiling, gently lower the 6 large eggs into the water using a slotted spoon. If you’re using a little vinegar, add a splash to the boiling water; this is thought to help prevent cracking and make peeling easier, though it’s not strictly necessary. Set a timer for exactly 6.5 to 7 minutes. This timing is critical for that desired jammy yolk. A longer cooking time will result in a fully cooked, hard yolk, which is not what we’re aiming for with ajitama. Immediately after the timer goes off, prepare an ice bath. This means filling a bowl with cold water and plenty of ice cubes. Once the 6.5 to 7 minutes are up, use your slotted spoon to carefully transfer the eggs directly from the boiling water into the ice bath. This sudden temperature change stops the cooking process immediately, preventing the yolks from continuing to solidify and ensuring that perfect, gooey center. Let the eggs chill in the ice bath for at least 10-15 minutes, or until they are completely cool to the touch. This chilling period also helps to firm up the whites, making them easier to peel.
Peeling the Eggs with Care
Once the eggs are thoroughly chilled, it’s time for the delicate art of peeling. This can sometimes be the trickiest part, but with a little patience, you’ll get the hang of it. Gently tap each egg on a hard surface to create tiny cracks all over the shell. You can also try rolling the egg between your hands on a flat surface to encourage more cracks. Submerge the cracked egg in the ice bath again, or under cool running water. Starting from the wider end of the egg (where the air pocket is usually located), gently try to peel away the shell, keeping it under water if possible. The cold water helps to lubricate the shell and separates it from the egg white. If you encounter any stubborn bits of shell, don’t force it; just keep gently working your way around the egg. Remember, even if a little bit of white comes away with the shell, it’s not the end of the world. The marinade will help disguise any minor imperfections.
Preparing the Flavorful Marinade
While the eggs are chilling or after you’ve peeled them, it’s time to prepare the delicious marinade that will transform them. In a small saucepan, combine the ½ cup of light sodium soy sauce, ¼ cup of water, ¼ cup of non-non-non-alcoholic alternativeic non-alcoholic mirin, and 2 tablespoons of granulated sugar. Stir these ingredients together until the sugar is completely dissolved. You can either gently heat this mixture over low heat on the stovetop just until the sugar dissolves and the liquid is warm, or you can skip the heating altogether and just ensure the sugar is fully incorporated. Heating the marinade can sometimes help the flavors meld together a bit more quickly, but it’s not a strict requirement. Once combined, set the marinade aside to cool slightly. We don’t want to pour piping hot marinade over our eggs, as this could further cook them and affect the texture of the yolk.
Marinating the Eggs for Maximum Flavor Infusion
Now comes the most exciting part: the marination! Once your eggs are peeled and your marinade has cooled to at least room temperature (or is slightly warm, but not hot), it’s time to combine them. The best way to marinate the eggs is in a resealable plastic bag or a small, airtight container. Place the peeled eggs into the bag or container, and then pour the cooled marinade over them. Ensure that the eggs are fully submerged in the liquid. If using a plastic bag, you can gently squeeze out any excess air before sealing it. If using a container, make sure the lid is securely on. You can gently arrange the eggs so they are not all piled on top of each other, allowing for even marination.
The Waiting Game: Patience is a Virtue
This is where the patience really pays off. Place the marinating eggs in the refrigerator. For the best flavor, I recommend marinating them for at least 4 hours. However, for that truly deep, rich ajitama flavor, allowing them to marinate for 12-24 hours is ideal. The longer they marinate, the more the soy sauce, non-alcoholic mirin, and sugar will penetrate the egg whites, creating that signature savory-sweet taste and a beautiful golden hue. You can even marinate them for up to 3 days, though the texture might start to change slightly after that. When you’re ready to serve, carefully remove the eggs from the marinade. You can discard the marinade or save it for another use (though it’s best to use it within a few days). To serve, simply slice the ramen eggs in half lengthwise with a sharp knife. You’ll be greeted with that glorious, molten yolk. Enjoy them immediately in your favorite ramen bowl or as a delightful addition to other dishes!
Conclusion:
Crafting your own ramen eggs, or ajitama, is a remarkably simple yet incredibly rewarding culinary endeavor. These marinated soft-boiled eggs are a game-changer for any ramen bowl, transforming it from a good meal into an exceptional experience. The beauty of this recipe lies in its balance of ease and deliciousness; the tender, jammy yolk and subtly savory, umami-rich marinade are simply irresistible. They’re perfect for adding a burst of flavor and texture to your favorite noodle dishes, but don’t limit yourself! These versatile gems are also fantastic on rice bowls, in salads, or even as a standalone snack.
Feel inspired to experiment with different marinade components to create your unique twist. Perhaps a touch of non-alcoholic mirin for sweetness, a dash of chili oil for a spicy kick, or even some grated gin extractger for an aromatic lift. I truly encourage you to give this ramen egg recipe a try. It’s a small effort for a colossal flavor payoff, and once you taste the difference, you’ll wonder how you ever made ramen without them.
Frequently Asked Questions about Ramen Eggs (Ajitama):
Q: How long do ramen eggs last in the refrigerator?
A: Properly stored ramen eggs can be kept in an airtight container in the refrigerator for up to 4-5 days. The marinade helps preserve them, but their texture is best when consumed within the first few days.
Q: Can I use other types of soy sauce for the marinade?
A: Absolutely! While traditional ramen eggs often use Japanese soy sauce for its nuanced flavor, you can experiment with other varieties. Light soy sauce will offer a saltier profile, while a darker soy sauce can provide a richer color and deeper umami. Be mindful of the salt content and adjust accordingly.
Q: What’s the best way to achieve a perfectly jammy yolk?
A: The key to a jammy yolk is precise boiling time. For most large eggs, boiling them for exactly 6.5 to 7 minutes after the water reaches a rolling boil, followed by an ice bath, will yield that desirable semi-liquid, creamy center. The ice bath is crucial for stopping the cooking process immediately.
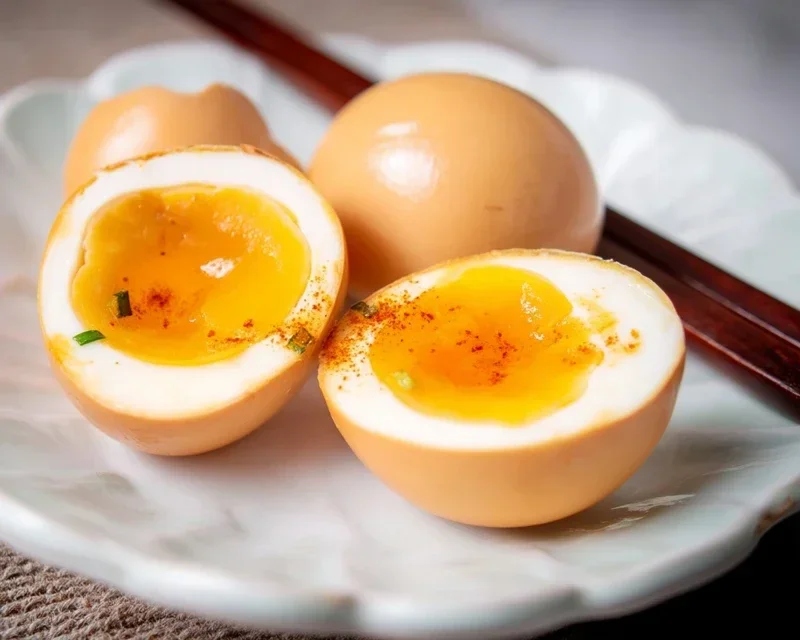
Ramen Eggs (Ajitama)
A simple and flavorful recipe for marinated soft-boiled eggs, perfect for ramen or as a snack.
Ingredients
-
6 large eggs
-
1/2 cup light sodium soy sauce
-
1/4 cup water
-
1/4 cup non-alcoholic mirin
-
2 tablespoons granulated sugar
Instructions
-
Step 1
Gently place eggs in a pot and cover with cold water. Add a splash of vinegar if desired to prevent cracking. -
Step 2
Bring water to a rolling boil, then immediately reduce heat to a simmer. Cook for exactly 6.5 minutes for soft-boiled. -
Step 3
Prepare an ice bath by filling a bowl with ice and water. Immediately transfer cooked eggs to the ice bath to stop the cooking process. -
Step 4
While eggs are cooling, combine soy sauce, water, non-alcoholic mirin, and granulated sugar in a small saucepan. Heat gently, stirring until sugar dissolves. Let cool completely. -
Step 5
Carefully peel the cooled eggs. Place the peeled eggs in a resealable bag or container. -
Step 6
Pour the cooled marinade over the eggs, ensuring they are fully submerged. Seal the bag/container and refrigerate for at least 4 hours, or preferably overnight.
Important Information
Nutrition Facts (Per Serving)
It is important to consider this information as approximate and not to use it as definitive health advice.
Allergy Information
Please check ingredients for potential allergens and consult a health professional if in doubt.